Have you ever captured a property photo that was nearly perfect — only to find the sky looking flat and uninspiring? A dull, gray background can drag down even the most impressive listing photos. On the flip side, a clear blue sky instantly elevates the scene, making a property appear more inviting.
The good news is that you don’t need perfect weather to achieve that effect. With modern editing tools and professional techniques, you can turn overcast skies into bright, natural-looking blue skies in just a few minutes. Whether you’re a beginner testing out editing software or an experienced photographer refining your craft, you’ll learn in detail from this blog why blue sky real estate photography matters, the most popular editing methods, and some best practices to bring out that realistic, picture-perfect sky.
1. The Role of Blue Sky Real Estate Photography
Weather has a powerful influence on emotion. Just think about how we describe moods: rainy day blues, a face like thunder, or sunny disposition. Language itself shows how much weather shapes our energy. And in real estate photography, the sky is no exception.
A bright blue backdrop instantly highlights architectural details, makes landscaping pop, and creates a positive emotional pull for potential buyers. Especially in a competitive property listing space, that split-second first impression can be the difference between someone clicking on your photo or scrolling past it. We’re now all aware that it’s not enough for photos to be high-quality, they also need to be visually compelling.
The challenge, of course, is that the weather doesn’t always cooperate. Shoots often happen in less-than-ideal conditions: on cloudy days, in winter light, or even when the sky is completely overcast. Gloomy weather can make even the most appealing property feel uninviting. That’s why blue sky real estate replacement and real estate photo enhancement have become essential tools for photographers and agents alike.
With the right tools, you can easily make a dull sky a bright and beautiful blue, instantly enhancing the atmosphere of your photos. And believe it or not, there’s more than one way for you to achieve it.
2. Top 3 Blue Sky Real Estate Photo Editing Solutions
The first step in creating blue sky real estate photos is choosing the right editing method. There are many options available, but here are three of the most effective:
2.1 Adobe Photoshop/ Lightroom
Photoshop and Lightroom are among the most widely used editing programs and are favorites among professional editors. They provide an extensive range of tools for adjusting brightness, contrast, saturation, and perspective. Most importantly, these programs allow you to isolate the sky and replace it with a blue sky image. With careful adjustments, you can make the final photo look natural and perfectly blended.
However, these tools come with a pretty steep learning curve. It takes hours of practice to master the techniques, and each photo often requires manual adjustments. For large batches, this can be time-consuming. Still, for those who want total creative control over the editing process and professional-grade results, the payoff is worth it.
2.2 Luminar AI
For those who prefer a faster, more automated solution, Luminar AI is a strong option. Its built-in AI handles much of the heavy lifting, making blue sky real estate replacement as simple as a few clicks. You can even switch up the time of day with effects like golden hour.
That said, overly dramatic skies can make your images look unrealistic. If the sky is dramatically different, you may need to adjust the brightness and tones of the rest of the photo for cohesive realism. Therefore, you’ll have to further fine-tune some of the edits yourself to keep the final results looking natural. While simpler than Photoshop, Luminar AI still requires some manual tweaks.
2.3 Professional Real Estate Post-Production Teams
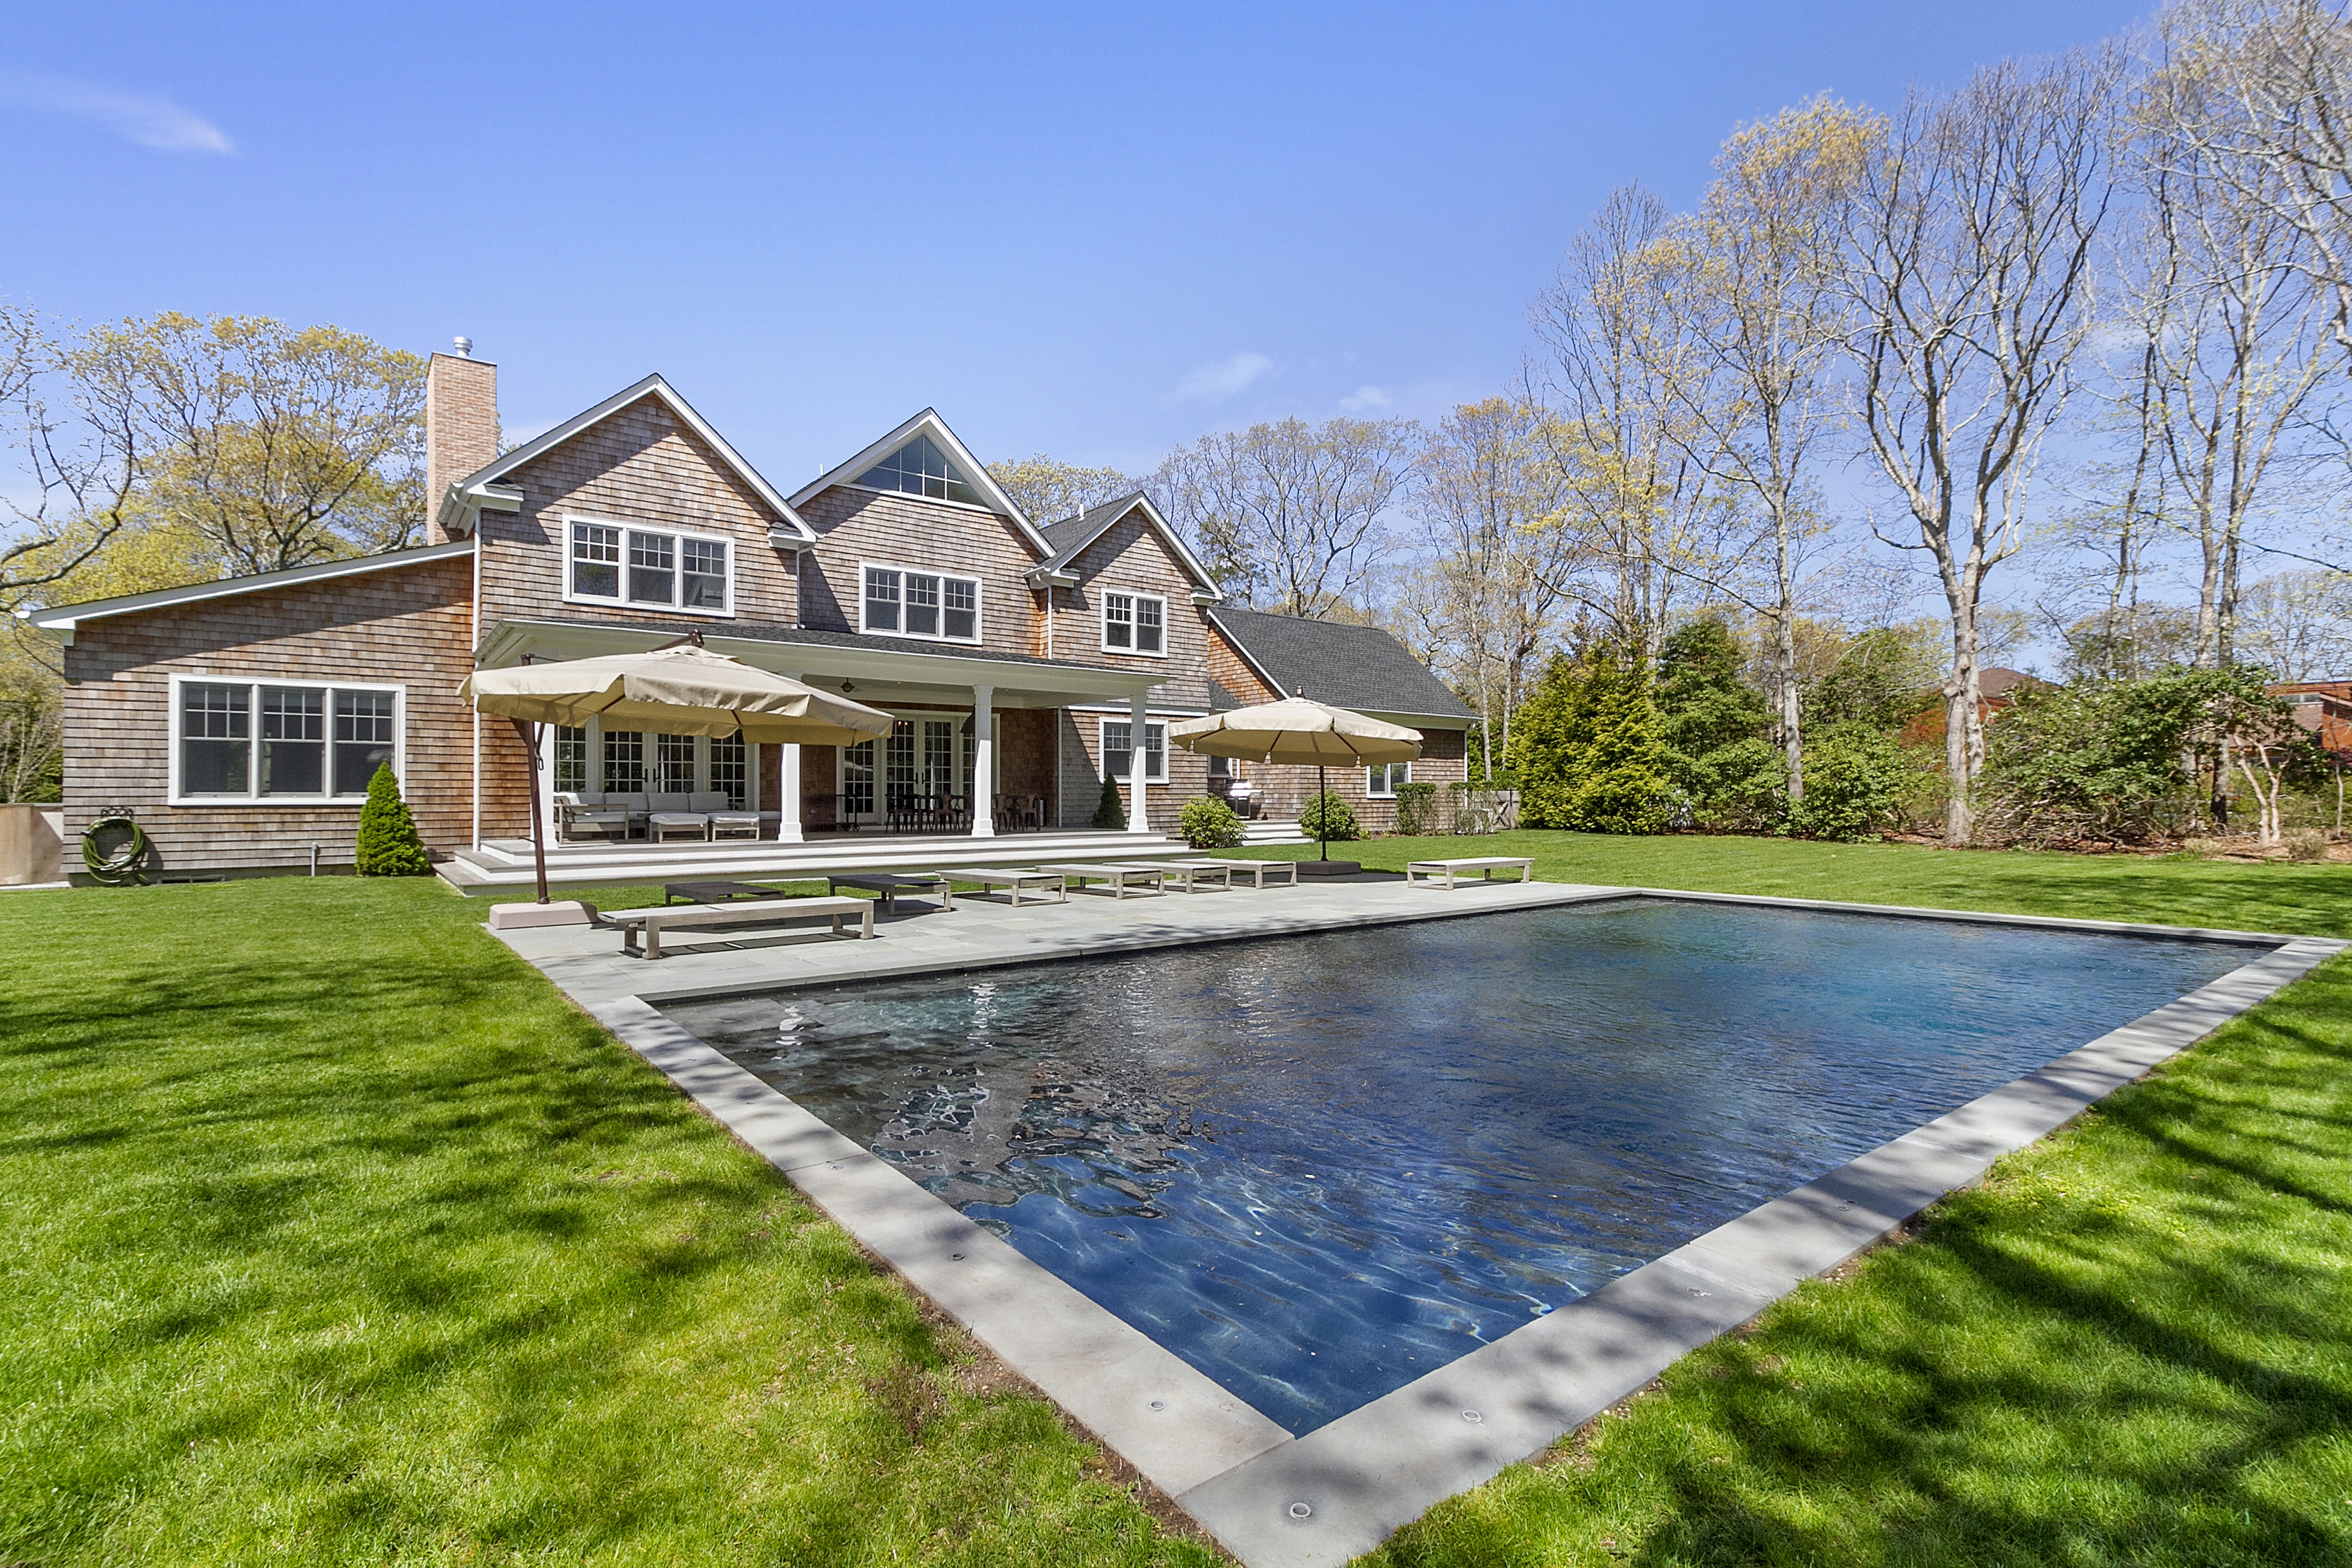
Blue sky in a property photo professional done by editors at Esoft
If editing isn’t your strength or you simply don’t have the time, outsourcing to a seasoned post-production company is a reliable choice. You send your photos in, and within a few hours, you receive professionally polished images with natural-looking blue skies.
The main advantage of this option is quality. Blue sky real estate photo editing is as much an art as it is a science, requiring a creative eye for lighting, composition, and color. Professional editors know how to balance tones, adjust brightness and contrast, and ensure the sky blends naturally with the rest of the photo.
However, you’ll need to wait for the edits and pay per photo. Still, for many real estate photography businesses, outsourcing is an excellent option when they want professional-level results without dedicating time and energy to mastering advanced editing skills. After all, the process of setting up a photo shoot, preparing the gear, capturing the shots, and then handling all the editing — including blue sky real estate editing — can take a significant amount of time away from your other important responsibilities.
If you’re looking to have your skies edited, Esoft’s expert real estate photo editing team can help you do that. As a leading real estate post-production company with 600+ photographers and 1,000+ editors specializing in real estate photography, we offer a complete range of photo editing solutions — from sky replacement to day-to-dusk transformation. Our ISO-certified workflow with strict quality control procedures ensures every image, including your blue sky real estate photos, meets the highest quality standards.
| For more details, check out our Photo Editing service.
3. How to Edit the Sky Blue in 5 Simple Steps
Making the sky blue in exterior photos is a simple process that can be done with a few basic techniques. Here, we’ll outline a step-by-step guide to blue sky real estate photo editing using Adobe Lightroom/ Photoshop:
3.1. Adjusting the Exposure:
In Lightroom: Open the Light panel in the Edit interface and drag the Exposure slider, move it right to brighten the photo, or left to darken it. For more precise control, you can use the Point Curve or adjust Highlights, Shadows, Whites, and Blacks individually. If you want a quick fix, click onto the Auto button in the Light panel and let Lightroom make the adjustment for you.
In Photoshop: Add an Exposure or Brightness/Contrast adjustment layer from the Adjustments panel, then use the sliders to brighten or darken as needed. For even finer control, switch to a Curves or Levels adjustment layer to tweak midtones, highlights, and shadows, correcting overexposed or underexposed areas with precision.
3.2. Adjusting the Contrast:
In Lightroom: Go to the Develop module (or the editing screen in Lightroom Mobile) and use the Contrast slider in the Light panel—slide right to boost contrast, left to reduce it. You can also adjust Highlights, Shadows, Whites, and Blacks to shape tonal contrast. For added punch, experiment with the Clarity and Dehaze sliders, which bring out midtones and overall definition.
In Photoshop: Open the Adjustments panel (Window ⇒ Adjustments) and add a Brightness/Contrast adjustment layer. From there, use the Contrast slider to make simple changes. For more detailed edits, try a Curves adjustment layer, which gives you precise control over tonal contrast.
3.3. Adjusting the Color Balance:
In Lightroom: Go to the Color panel in the Develop module and start with the Temperature slider to shift between cool and warm tones. Use the Tint slider to balance between green and magenta. To refine specific colors, open the Color Mixer (or the HSL panel in Lightroom Classic) and adjust the hue, saturation, or luminance of individual colors for targeted corrections.
In Photoshop: Add a Color Balance adjustment layer by going to Layer ⇒ New Adjustment Layer ⇒ Color Balance, or click the “new adjustment layer” icon in the Layers panel. In the Properties panel, choose a tonal range — Shadows, Midtones, or Highlights — and move the sliders to add or reduce color. For example, shifting toward Cyan adds more cyan, while sliding toward Red introduces warmer tones.
3.4. Adding Clouds and Other Effects
In Lightroom: Open the Masking panel and use a Radial or Linear Gradient. Within that area, lower Dehaze to introduce haze and reduce Contrast for a soft, foggy look. For skies, use the AI-powered Sky Mask to isolate the sky and then tweak Exposure, Highlights, and other light settings to enhance cloud details.
In Photoshop: Go to Filters ⇒ Render ⇒ Clouds or Difference Clouds to generate quick, cloud-like textures. For a more realistic sky, use Sky Replacement with built-in options or your own images. You can also add a cloud photo on a new layer, set it to Screen blending mode and refine it with a Levels adjustment. For advanced blending, use Blend If in Layer Styles to seamlessly merge clouds. Alternatively, try custom cloud brushes or paint them manually on a layer with a mask for full creative control.
4. Best Practices for Editing Blue Sky Real Estate Photos
When editing the sky in photos, it’s important to stay mindful of a couple things:
Experiment with different exposure and color balance settings until you find the look that feels natural. If the sky is still too dark or too light, use the Levels or Curves tool to adjust the shadows, midtones, and highlights.
When replacing the sky, always choose one that fits the property’s actual location. A home in the northern hemisphere should have skies that reflect its season and weather patterns. Similarly, a beach property wouldn’t look right with a starry night sky in the background, or adding a clear blue sky to a property located in a region known for frequent overcast weather can give potential buyers a false impression.
Overly dramatic or unrealistic blue sky real estate photo editing also raises ethical concerns. It’s best to stick with natural-looking options that complement the property’s real environment.
Pay close attention to how highlights and shadows interact, as well as the color shift that a brighter, bluer sky may introduce to other objects in the photo. A background that’s too bold, oversaturated, or inconsistent with the rest of the image can look artificial. Likewise, if you don’t match the direction of light on trees, buildings, and other structures, the final image will appear unconvincing.
5. Wrapping Up
Editing skies is one of the simplest yet most effective ways to enhance your property photos. With the right tools and techniques, you can replace dull gray skies with vibrant blue ones that make listings stand out.
Whether you’re just starting out or already a seasoned photographer, the methods above can help you produce stunning results. So go ahead — experiment, practice, and bring more blue sky real estate photos to your portfolio.
| Contact us today at info.vn@esoft.com to talk with our photo experts about sky editing and more!





Linh Phan
Content Strategy Executive
No Spam, Just Updates
Our fresh blogs provide technical and industrial information that helps strengthen your business. Sign up to be the first to receive the new updates